How to Use Phpmyadmin to Upload Database to Amazon Rds
Importing and exporting information are mutual tasks involved with administering databases. Migrating data between on-premises and cloud databases can be frustrating especially if the jobs need to be repeated again and again. In this article, we provide a comprehensive step-by-footstep guide to getting data in Amazon RDS with the help of dbForge Studio for MySQL.

Information Export and Import tools of dbForge Studio for MySQL
dbForge Studio for MySQL can avowal advancedData Export and Import tools. They are highly customizable and enable data transfer speedily and easily. Studio supports data import and export via the user interface and its Export\Import wizards help you through data migration one step at a time by asking for the necessary configurations. The wizards are easy-to-follow assuasive non-experts to use it effectively.
Import MySQL data to AWS RDS
In this worked case, we will import MySQL data previously saved to an MS Excel file.
Pace 1: Establish a connectedness
To offset working with the Import utility of dbForge Studio for MySQL, we demand to constitute a connection to the target database. To add a new connectedness navigate Database -> New connectedness. In the Database Connexion Properties window, make all the necessary connection settings.

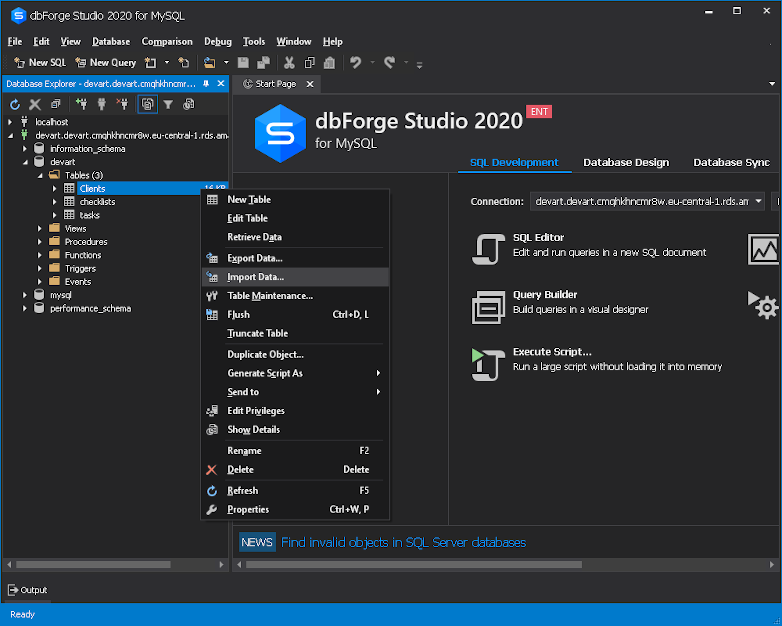
Step two: Open Data Import magician
To import data from a file, you need to phone call the Import magician. This tin be done from the Information Pump tab on the Start Page. Alternatively, in the Database Explorer, correct-click a table you want to import data to and select the Import Data command from the context carte du jour that appears.
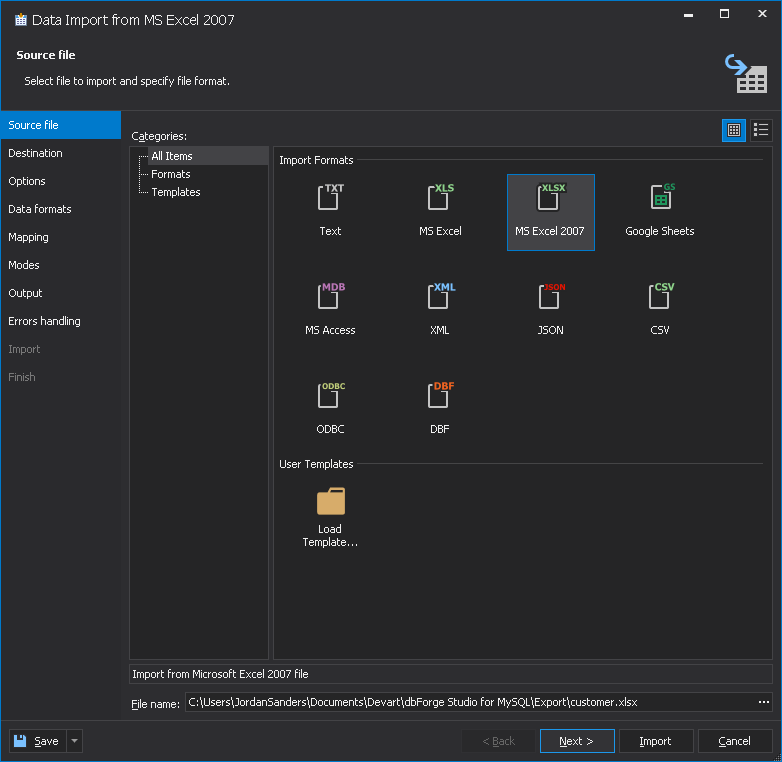
Step 3: Select file format
In the Data Import wizard, select a file to import and specify its format. In this tutorial, we will import MySQL data to Amazon RDS from one of the most common formats – MS Excel 2007.
Having selected a format and provided a path to the file, click Next.
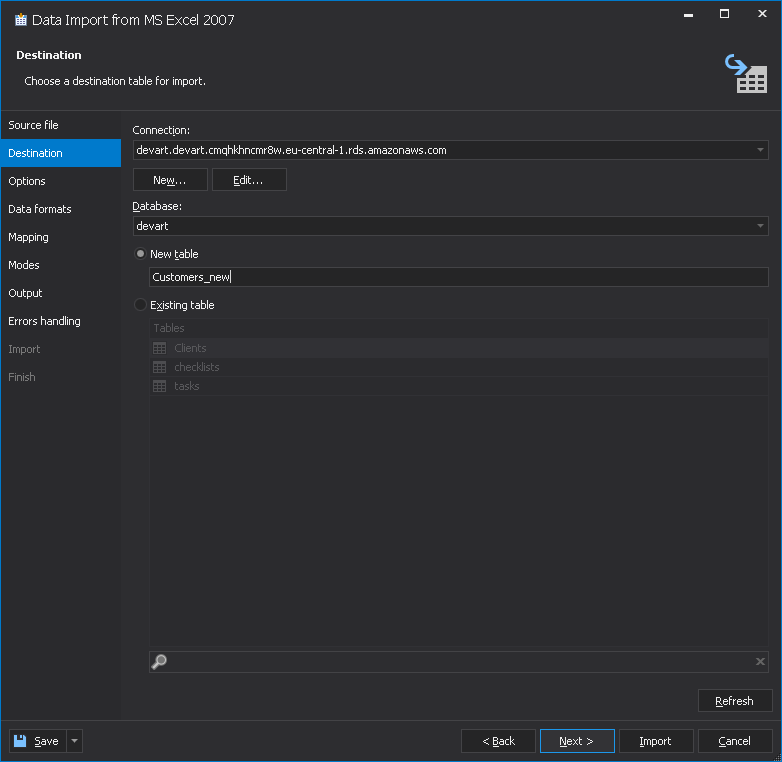
Stride iv: Choose a destination tabular array
On the Destination tab of the Data Import wizard, you demand to select a table on AWS RDS to import your MySQL data. You can choose to move data either to a new table or to an existing one. In our instance, nosotros select to import data to a new tabular array: Customers_new. Click Next after you lot've made all the necessary settings.
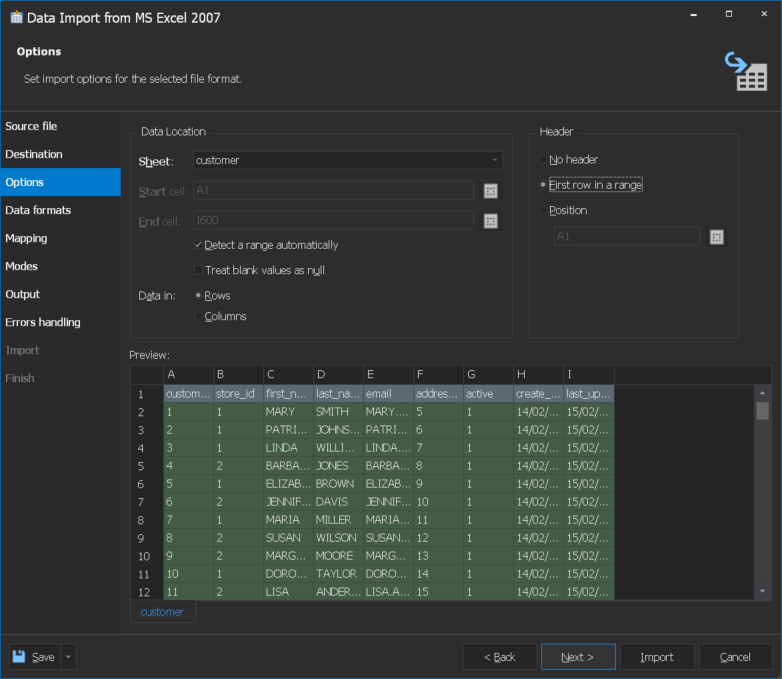
Step v: Set import options for the selected file format
The Options tab of the Data Import wizard provides the possibility to gear up import options for the selected file format and preview the data.
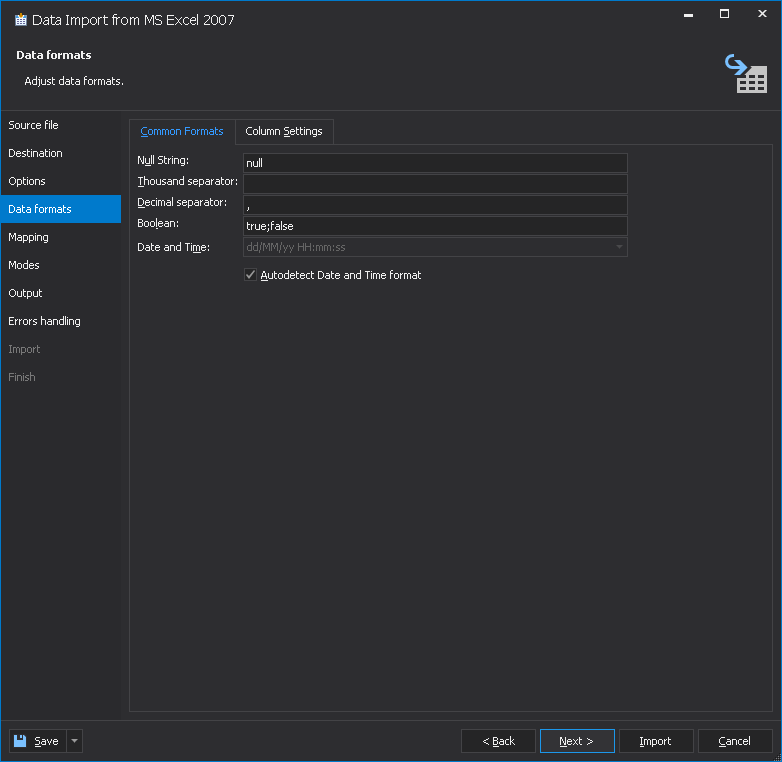
Step 6: Adjust data formats
On the Data formats tab, you lot tin adjust information formats and cavalcade settings.
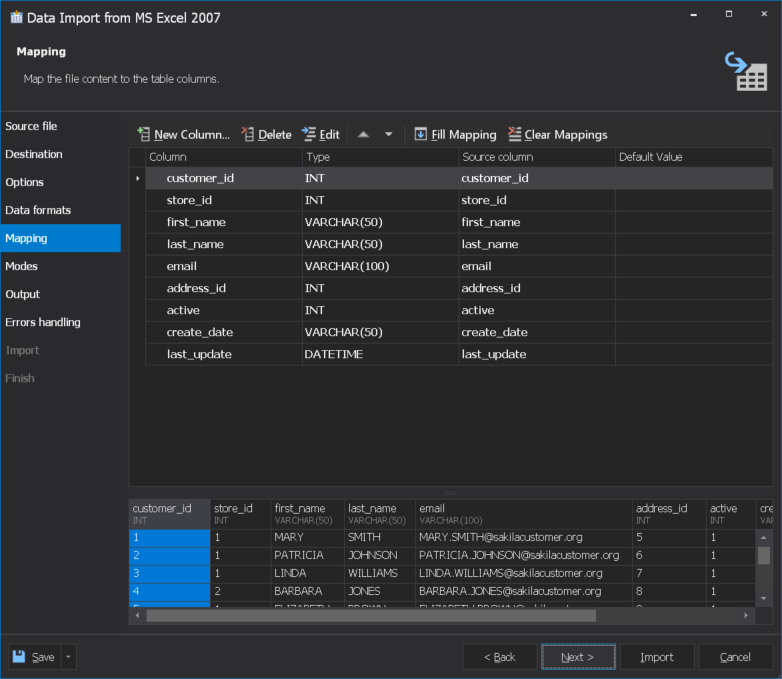
Step 7: Mapping the file contents to the table columns
The Mapping tab enables mapping the file contents to the table columns. Here you can:
– change the sequence of imported columns
– alter the names of the columns and their types of data
– remove a column from import
– preview the data to be imported
… and more.
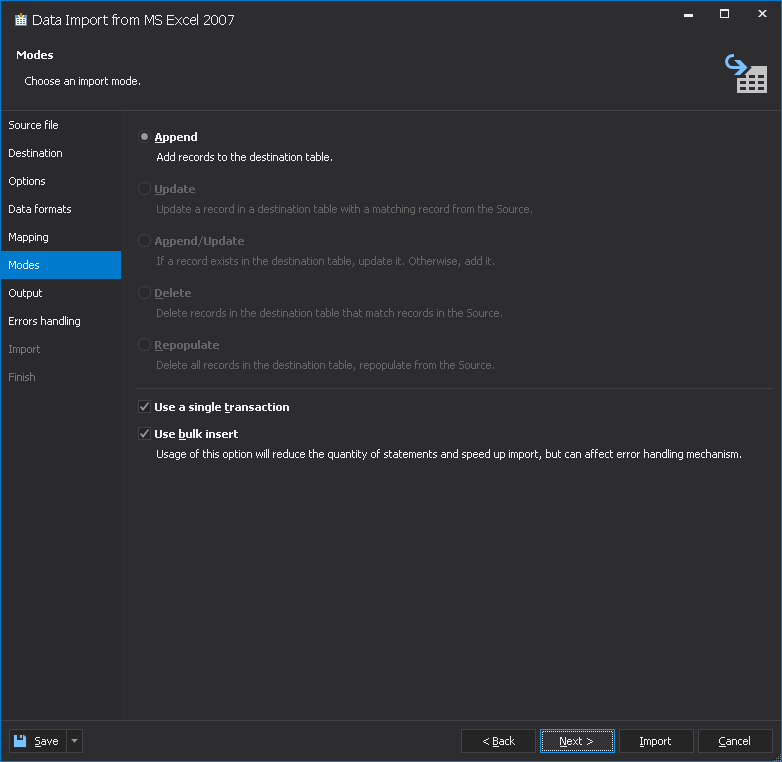
Step 8: Select the import mode
On the Modes tab of the Data Import wizard, you can select how MySQL database data will exist imported to Amazon RDS. The following options are bachelor:
– Append (the records will exist added to the destination tabular array)
– Update (a record in the destination table will be updated with a matching tape from the source tabular array)
– Delete (the records in the destination table that match records in the source tabular array will exist deleted)
– Repopulate (all the records in the destination table volition be deleted and and then the table will be populated with the records from the source table).
Here y'all tin also choose a mechanism of data insert: either using a single transaction or via a majority insert.
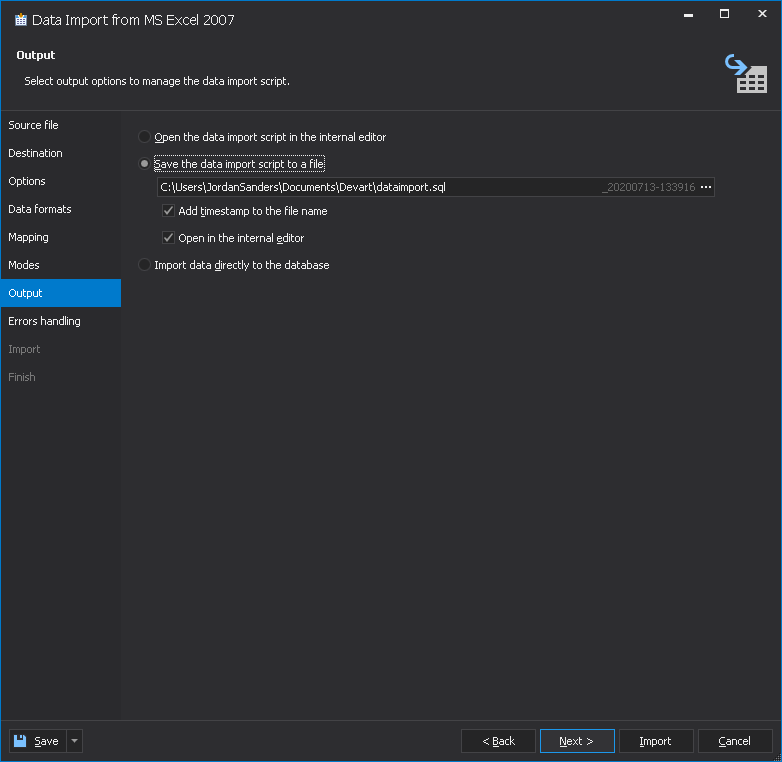
Step 9: Select the script output options
In this pace, you need to select output options to manage the data import script. You can choose to:
– Open up the data import script in the internal editor
– Save the data import script to a file and specify a path to it
– Import data directly to a database.
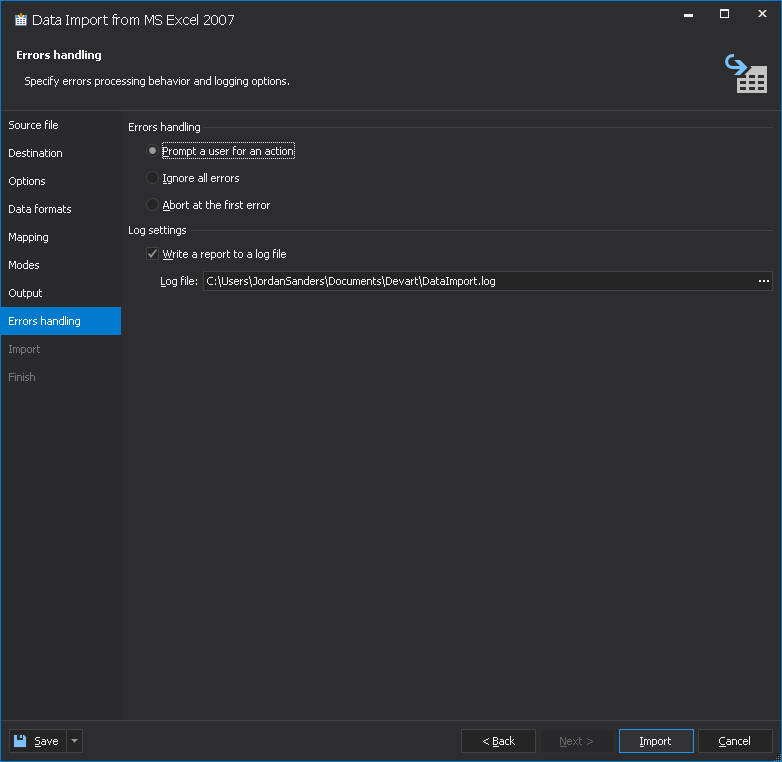
Footstep 10: Specify errors processing beliefs and logging options
Finally, on the Errors handling tab, you can configure the awarding beliefs in case it encounters an error. Here you tin can as well tune the logging options.
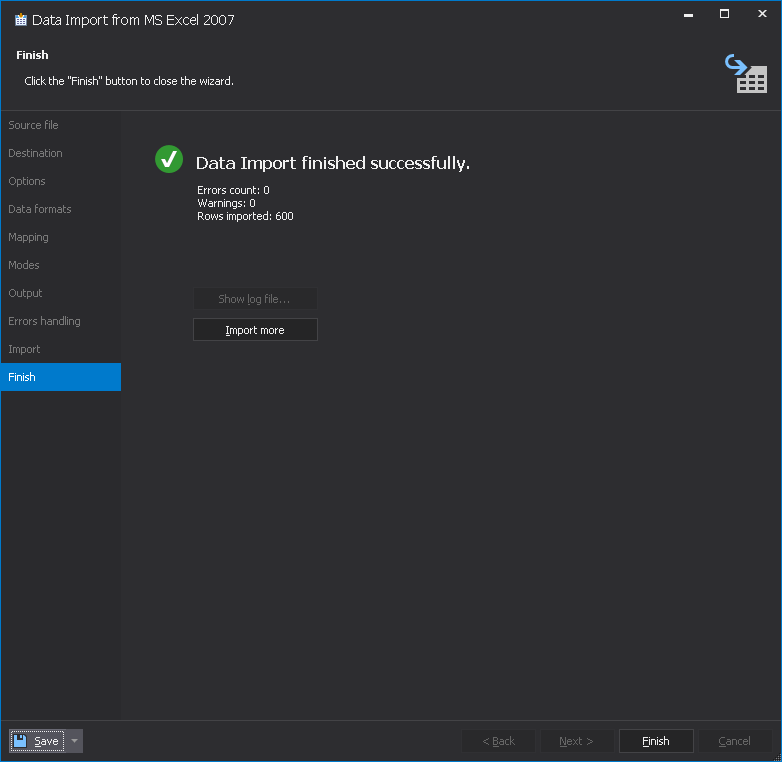
Footstep 11: Finish import and save the template
Having completed all the steps, click the Import button. Yous will see a notification about the result of your import job. An essential advantage of dbForge Studio for MySQL is the power to save the import configurations for recurring import scenarios. Click the Salve button to salvage the settings either every bit an import template or as a batch file for command-line operations.
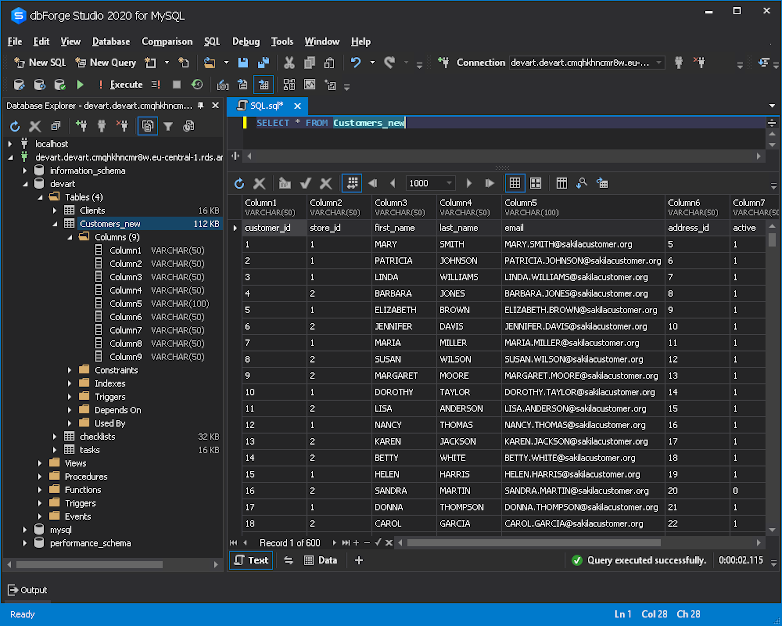
Step 12: Check the upshot
As a result of our import efforts, the Customers_new tabular array appeared on Amazon RDS.
Notation:
Information technology is also possible to export MySQL data to a file to migrate information technology to another local or remote database. To larn how to export data to a file using dbForge Studio for MySQL, delight see our next tutorial.
Conclusion
With dbForge Studio for MySQL, MySQL data import to Amazon RDS becomes much simpler, faster, and more robust. The ability to save import options as a template allows you to skip configuring import jobs again and again and thus saves your fourth dimension and efforts. The Save every bit Command line option enables scheduling and automating migration tasks making database management easier. Try dbForge Studio for MySQL and run across for yourself! Also, y'all can watch this video tutorial:

- Author
- Recent Posts
See as well
Source: https://blog.devart.com/import-mysql-data-to-amazon-rds.html
0 Response to "How to Use Phpmyadmin to Upload Database to Amazon Rds"
Postar um comentário